

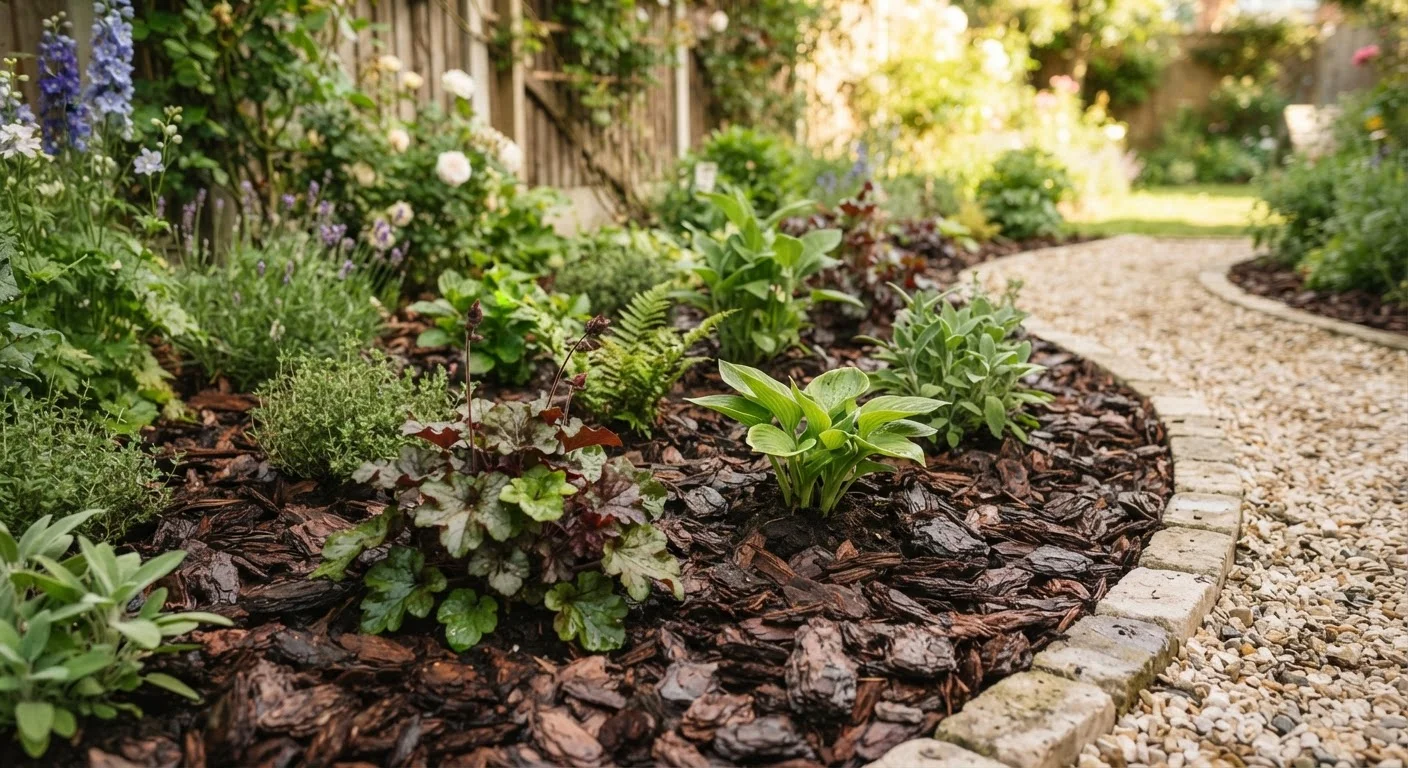
Why Mulching Is One of the Most Impactful Garden Habits
Mulching does more work per dollar and per hour than almost any other garden maintenance task. A properly mulched bed retains significantly more soil moisture - reducing how often you need to water - while simultaneously suppressing weed germination, moderating soil temperature, and protecting surface roots from compaction. Over time, organic mulches also break down into the soil, gradually improving its structure and fertility in ways that benefit plants season after season.
Whether you're managing raised beds or in-ground garden spaces, a consistent mulching routine pays dividends across the entire growing season. It's also one of the most accessible tasks for beginners - requiring no specialized skill, just the right materials and a clear understanding of how to apply them.
The most common mistakes aren't about effort - they're about depth, placement, and timing. This guide addresses each one so your mulching actually delivers the results it promises.
Garden fork or spade
Used to loosen and lightly cultivate the bed surface before applying mulch.
Wheelbarrow
Transports bulk mulch efficiently from a delivery pile or storage area to your beds.
Garden gloves
Protects hands from splinters, scratches, and contact with soils or dyes in dyed mulches.
Rake (bow or garden rake)
Spreads and levels mulch evenly across the bed surface.
Measuring tape or ruler
Helps verify mulch depth so you hit the 2-4 inch target accurately.
Garden hose with gentle spray nozzle
Lightly wets mulch after application to help it settle and resist wind displacement.
Common Mulching Mistakes (and How to Avoid Them)
Even experienced gardeners make mulching errors that quietly undermine their plants. The most widespread is applying mulch too thickly - layers exceeding 4-5 inches can prevent rain and irrigation from penetrating to the root zone at all, and may deprive roots of adequate oxygen. If your mulch layer feels spongy and wet on the inside after rain, it's likely too thick.
Mulching over dry, unwatered soil is another frequent misstep. Mulch is excellent at maintaining whatever moisture level already exists in the soil, but it's far less effective at drawing moisture in. If the soil is bone dry before you mulch, you'll need to water deeply first - otherwise you're essentially preserving a drought condition.
Never Pile Mulch Against Plant Stems
Mounding mulch directly against stems or tree trunks - sometimes called a "mulch volcano" - traps moisture and promotes fungal disease and rot. It can also encourage pests to nest close to the plant. Always leave a clear gap of at least 2-3 inches around the base of every plant.
Finally, many gardeners mulch once and forget it. Because organic mulch breaks down over time - which is actually a good thing for soil health - the protective layer gradually thins. Staying on top of this is why a twice-yearly routine matters. Gardeners who also manage heat and drought stress through summer find that mulching is one of their most reliable defenses.
Mulch and Compost Work Well Together
For the best results, apply a thin layer of finished compost directly on the soil surface before adding your mulch on top. The compost feeds soil biology while the mulch locks in moisture and keeps temperatures stable. See our guide to home composting to get started with your own supply.
Putting It All Together: Steps for a Well-Mulched Bed
The following steps walk you through the complete process from bed preparation to post-application care. Having your materials gathered and your tools ready before you start makes the job faster and produces more consistent results.
What you will need
Choose the right mulch type for your bed
Not all mulches serve the same purpose. Select based on your goals:
- Shredded bark or wood chips: Widely available, slow to break down, and well-suited to ornamental shrubs and trees.
- Straw or hay: Excellent for vegetable gardens - lightweight, easy to move at season's end, and breaks down quickly to feed the soil.
- Shredded leaves: A free option from your own yard. Breaks down into rich humus and works well in any bed type.
- Compost: Doubles as a soil amendment; best used as an underlayer rather than a surface mulch on its own, since it can dry out quickly when exposed.
- Inorganic options (gravel, landscape fabric): Long-lasting but do not improve soil. Best reserved for pathways or low-maintenance ornamental areas where you don't want annual topping up.
Prepare the bed before mulching
Mulching over weeds simply hides the problem - it doesn't eliminate established roots. Before you spread anything:
- Remove all visible weeds by hand or with a garden fork, pulling as much root as possible.
- Water the bed lightly if the soil is very dry. Mulch locks in whatever moisture is present, so starting with dry soil undermines the whole effort.
- Edge the bed perimeter with a spade or edging tool to create a clean boundary that keeps mulch contained and the lawn out.
Apply mulch at the correct depth
Depth is the most misunderstood variable in mulching. The general guideline is 2-4 inches:
- 2 inches is sufficient for fine-textured mulches like compost or shredded leaves that compact easily.
- 3-4 inches works well for coarser materials like wood chips or bark that allow better air and water movement.
Use your rake to distribute mulch evenly. A ruler or measuring tape is a genuinely useful tool here - many gardeners underestimate how quickly a pile thins out once spread.
Maintain clearance around plant bases
Pull mulch back from the crown of every plant - the point where the stem meets the soil. Aim for a gap of at least 2-3 inches around herbaceous plants and 6 inches or more around shrubs and tree trunks.
This step is easy to forget when spreading a large area quickly, but it's critical. Trapped moisture at the stem base creates ideal conditions for crown rot, fungal infection, and pest activity. Walk the bed after raking and do a quick check of every plant base.
Water the mulch lightly after application
A gentle pass with a hose after spreading accomplishes two things: it helps the mulch settle into place, and it reduces the chance of lightweight material blowing away before it knits together. Use a soft spray setting to avoid displacing the mulch or channeling water away from the bed.
You don't need to saturate the mulch - the goal is simply to dampen the surface layer so it behaves like a cohesive blanket rather than loose material.
Plan for seasonal top-ups
Organic mulches break down over a growing season, which is actually a benefit - they feed soil biology as they decompose. But it also means the effective layer gets thinner over time. Plan to top up your beds once or twice per year:
- Spring: Refresh mulch after winter to suppress early-season weeds and retain moisture through the growing season.
- Late fall: Add a fresh layer to insulate root zones against freeze-thaw cycles.
Before each top-up, check whether existing mulch has compacted into a dense mat. If so, loosen it lightly with a fork before adding new material - a compacted mulch layer can actually repel water rather than absorb it.
Avoid Fresh Wood Chips Near Vegetables
Freshly chipped wood can temporarily tie up nitrogen in the soil as it begins to decompose, potentially starving nearby plants. Use aged or composted wood chips in vegetable beds, or apply fresh chips to ornamental paths and borders where this effect matters less.
When you're done, step back and assess the finished bed. Mulch should look even, the soil should be fully covered between plants, and no stem bases should be buried. A well-mulched bed is also the foundation for healthier soil over the long term - pairing it with good soil health practices gives your plants the best possible growing environment.
The content on this site is for informational purposes only and is not a substitute for professional advice. Always consult a qualified professional for guidance specific to your situation.