

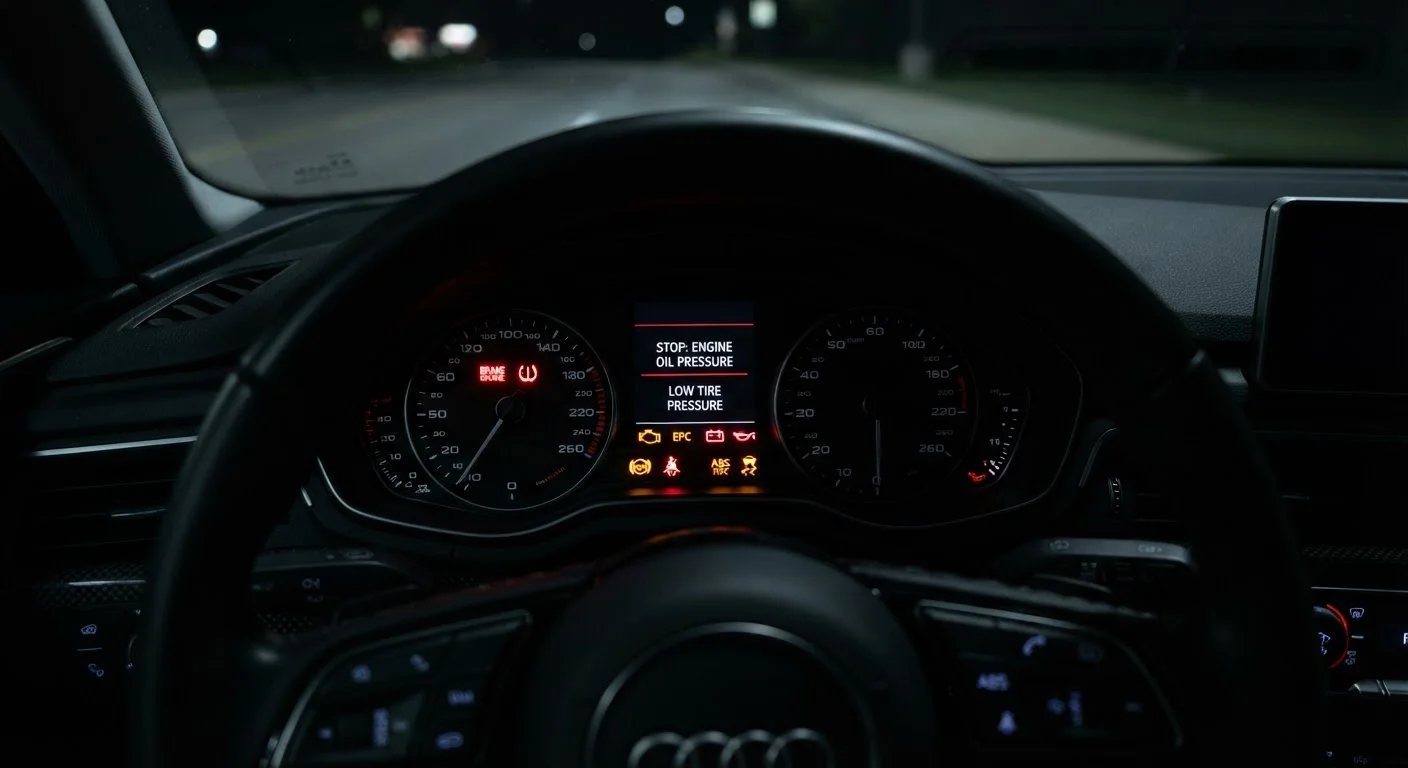
How Dashboard Warning Lights Work
Modern vehicles use an onboard diagnostics system (OBD-II, standard on US cars since 1996) that continuously monitors dozens of sensors. When a reading falls outside acceptable parameters, the system triggers a warning light on your instrument cluster. Understanding the color-coding helps you prioritize your response.
- Red lights signal immediate danger - stop safely as soon as possible and do not continue driving until the issue is resolved.
- Yellow or amber lights mean something needs attention soon but is not yet an emergency - schedule service within a few days.
- Green or blue lights are informational, confirming that a system is active (e.g., high beams, turn signal).
Your owner's manual remains the single most authoritative reference for your specific vehicle. Symbols and their exact meanings can vary by manufacturer, so consulting it first is always a sound practice.
The Most Common Warning Lights Explained
Below are the dashboard lights drivers encounter most frequently, what they actually indicate, and how urgently each one demands action.
OBD-II
On-Board Diagnostics II - a standardized vehicle self-diagnostic system required on all US passenger cars since 1996. It monitors sensors throughout the vehicle and stores fault codes when readings fall outside normal ranges.
Malfunction Indicator Light (MIL)
The formal name for the check engine light. It illuminates when the OBD-II system detects a fault in the engine, transmission, or emissions systems.
Diagnostic Trouble Code (DTC)
A numeric code stored by the OBD-II system when a fault is detected. A mechanic reads these codes with a scan tool to identify the source of a warning light.
TPMS
Tire Pressure Monitoring System - a sensor-based system required on US passenger vehicles since 2007 that alerts drivers when tire pressure drops significantly below the recommended level.
Coolant
A liquid (also called antifreeze) that circulates through the engine to regulate operating temperature. Low coolant or a cooling system failure can cause rapid overheating.
Alternator
A generator driven by the engine that recharges the battery and powers electrical systems while the car is running. A failing alternator triggers the battery warning light.
Check Engine (MIL)
The Malfunction Indicator Light (MIL) - often a small engine outline - is one of the most misunderstood signals on the dash. It can represent anything from a loose gas cap to a misfiring cylinder. A steady light typically means a non-urgent fault worth diagnosing within a few days. A flashing check engine light usually signals an active misfire that can damage your catalytic converter - reduce speed and seek service promptly. A mechanic will connect a scan tool to read the stored fault codes and pinpoint the cause. See our maintenance schedule guide to understand which services can prevent common MIL triggers.
Oil Pressure Warning
This red light - typically an oil can symbol - means your engine is not receiving adequate oil pressure. Pull over safely and turn off the engine immediately. Continuing to drive can cause catastrophic, often irreparable engine damage within minutes. Check your oil level; if it's fine, have the vehicle towed rather than driven to a shop.
Temperature Warning
A red thermometer symbol means your coolant temperature is dangerously high. Pull over, turn off the engine, and let it cool before opening the hood. Never remove the radiator cap while the engine is hot. Low coolant, a failed water pump, or a burst hose are common causes.
Battery / Charging System
This amber or red battery outline means the charging system isn't maintaining voltage - often a failing alternator or a worn drive belt. Your car may keep running temporarily on battery reserve alone, but electrical systems will begin failing. Drive directly to a shop or home, avoiding unnecessary accessories like AC and audio.
Tire Pressure Monitoring System (TPMS)
Required on all US passenger vehicles sold after September 2007, the TPMS light (an exclamation point inside a tire cross-section) illuminates when one or more tires falls roughly 25% below the recommended pressure. Underinflated tires reduce fuel economy, increase wear, and raise the risk of blowouts. Check and adjust pressure when the tires are cold. See our pre-trip safety checklist for guidance on checking tires before longer drives.
Brake System Warning
A red circle with an exclamation point (or the letter "P" in a circle) often signals the parking brake is still engaged. Release it and confirm the light goes off. If the light stays on while driving, your hydraulic brake fluid may be low or there is a fault in the braking system - have it inspected immediately. Do not ignore a brake warning light.
When to Act Immediately vs. Schedule Service
Not every illuminated symbol requires you to pull over on the spot, but none should be ignored indefinitely. A useful rule of thumb:
- Stop driving now: Oil pressure, engine temperature (red), brake system fault, or any red warning you cannot identify.
- Drive directly to a shop: Battery/charging system, a flashing check engine light.
- Schedule within a few days: Steady check engine light, TPMS, low fuel, service reminders.
When you do seek a diagnosis, a qualified mechanic will use a scan tool to pull diagnostic trouble codes (DTCs) - the numeric codes the OBD-II system stores. Ask for those codes in writing; they belong to you and help you make informed decisions. For guidance on finding a reliable shop, see how to choose a mechanic you can trust.
Your Owner's Manual Is the Final Word
Warning light symbols and their exact meanings are not fully universal - they can differ across manufacturers and model years. Always cross-reference any unfamiliar symbol with your vehicle's owner's manual before drawing conclusions. Most manuals include a dedicated warning light reference section, and digital versions are often available on the manufacturer's website.
This article provides general educational information about vehicle warning systems. Always consult your owner's manual and a qualified mechanic for diagnosis and repair decisions specific to your vehicle.
The content on this site is for informational purposes only and is not a substitute for professional advice. Always consult a qualified professional for guidance specific to your situation.