

Why These Three Materials Get Confused
Walk into any tile aisle at a home improvement store and you'll see bags and bottles of mortar, grout, and sealant displayed inches apart. They look similar, they're used on similar projects, and their names are sometimes used interchangeably - incorrectly. Each material does a fundamentally different job in a tile installation, and using the wrong one, or skipping one entirely, can lead to cracked tiles, water damage, or failed adhesion over time.
This guide breaks down what each material is, what it actually does, and where it belongs in a tile project so you can approach your next bathroom, kitchen, or entryway installation with confidence.
| Purpose of mortar | Bonds tile to the substrate (subfloor or wall) |
| Purpose of grout | Fills and stabilizes the joints between tiles |
| Purpose of sealant | Protects grout and porous tile surfaces from moisture and staining |
| Correct order of application | Mortar → tile set → grout → sealant |
| Grout sealing frequency | Every 1-2 years in wet or high-traffic areas |
| Corner joints | Use flexible silicone caulk, not grout, at corners and tub edges |
Mortar: The Foundation That Holds Tiles in Place
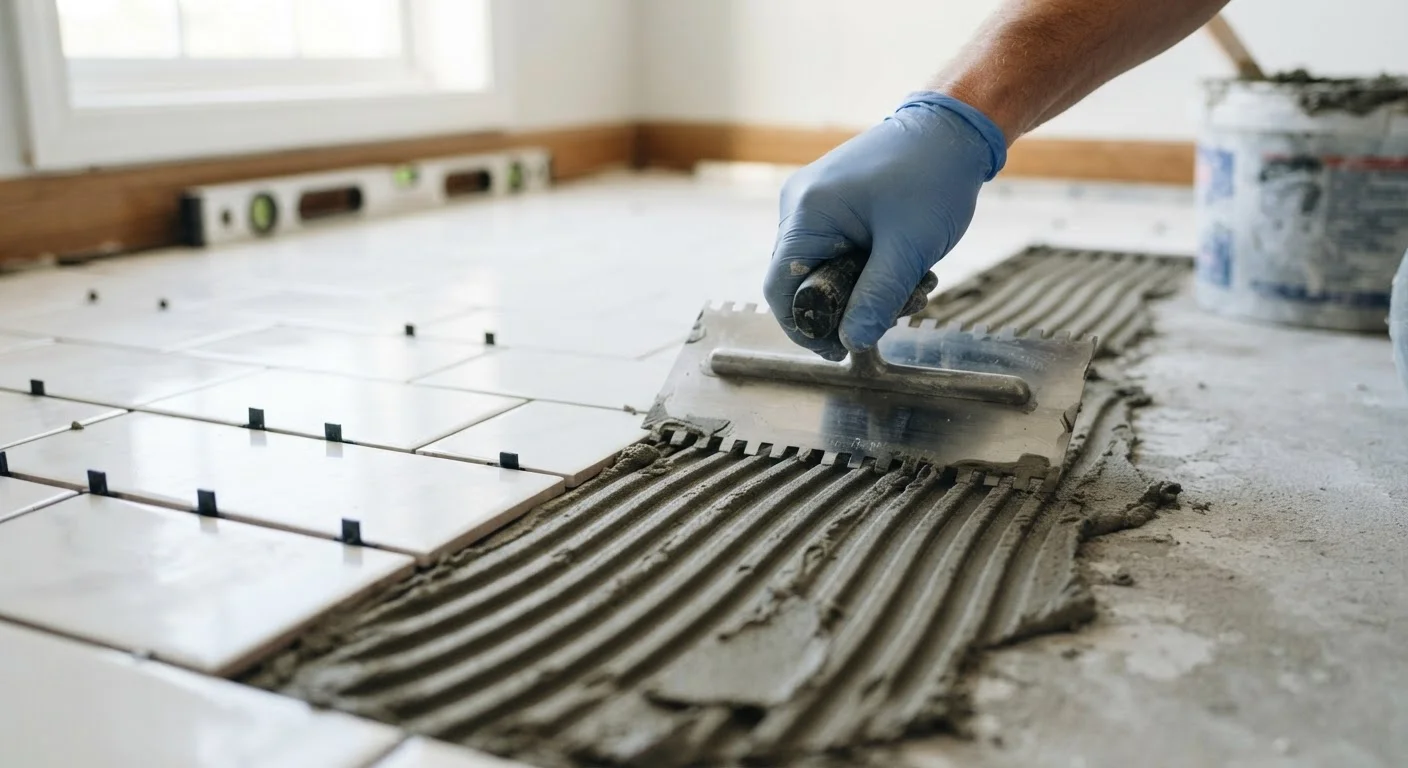
Mortar (often called thinset mortar or thinset) is the adhesive layer that bonds tile to a substrate - the surface underneath, such as a concrete slab, cement board, or properly prepared drywall. It is applied before the tile goes down and is not visible once the job is complete.
Thinset mortar is a mixture of cement, fine sand, and a water-retention agent. When mixed with water and spread with a notched trowel, it creates a firm, slightly flexible bond that can support the weight of tile and withstand the minor movement that all structures experience. There are also modified thinsets that include polymer additives for stronger adhesion in demanding applications like large-format tiles or heated floors.
When mortar is the right choice
- Bonding ceramic, porcelain, natural stone, or glass tile to floors, walls, or countertops
- Wet or high-humidity areas like showers, tub surrounds, and bathroom floors
- Any surface where permanent adhesion is required
One important note: mortar is not a gap filler. It goes under the tile, not between tiles. Applying mortar to fill grout lines is a common DIY mistake that produces poor results.
Thinset mortar
A cement-based adhesive mixed with fine sand and water-retention additives. It bonds tile to a substrate and is applied beneath the tile before installation.
Substrate
The structural surface to which tile is bonded - such as a concrete slab, cement backer board, or prepared drywall.
Grout joint
The deliberate gap left between tiles during installation. These joints are filled with grout after the mortar cures.
Epoxy grout
A resin-based grout that does not require sealing and resists staining and chemical damage better than cement-based grout.
Silicone caulk
A flexible, waterproof sealant used at corners and tile-to-fixture joints where slight structural movement could crack rigid grout.
Modified thinset
Thinset mortar that includes polymer additives for improved flexibility and adhesion, often specified for large-format tiles or in-floor heating systems.
Grout: The Material That Fills the Gaps
Grout is a cement- or resin-based filler applied after tile is set and the mortar has fully cured. It fills the joints - the deliberate spaces left between tiles - and serves both a structural and aesthetic purpose. Structurally, grout stabilizes tiles and prevents debris, moisture, and pests from infiltrating the gaps. Visually, it defines the look of a tiled surface, and color choices can dramatically affect the finished appearance.
Types of grout and where they're used
- Sanded grout - contains fine sand aggregate; used for joints wider than 1/8 inch; common on floor tiles
- Unsanded grout - smoother texture; used for narrow joints under 1/8 inch; preferred for wall tiles and polished stone
- Epoxy grout - resin-based rather than cement-based; highly stain- and chemical-resistant; often used in kitchens and commercial settings
Grout requires time to cure before use, and most cement-based grout benefits from sealing after curing - which is where the third material enters the picture. For a broader look at flooring decisions in wet spaces, see our guide to tile vs. luxury vinyl plank for wet rooms.
Sealant: The Protective Layer That Extends Tile Life
Sealant is not an adhesive - it does not hold anything together. Instead, it forms a protective barrier that repels water, oils, and staining agents. There are two main sealant applications in tile work:
Grout sealer
Applied to cured cement-based grout, a grout sealer penetrates the porous surface and blocks moisture absorption. Without it, grout in showers and around sinks can absorb water, harbor mold, and stain from soap scum or food. Most cement-based grout should be sealed within 48-72 hours of full cure and resealed periodically based on use - high-traffic or wet areas generally need attention every one to two years.
Stone and tile sealer
Natural stone tiles - marble, travertine, slate - are porous and require their own sealer applied directly to the tile surface, not just the grout. Porcelain and ceramic tiles are typically dense enough that the tile face does not require sealing, though grout lines still do.
Silicone caulk as a sealant
In the corners of showers and where tile meets a bathtub rim, flexible silicone caulk is used rather than grout. Unlike rigid grout, caulk can flex slightly with structural movement without cracking - a critical detail in preventing water infiltration at joints that experience stress.
Permits and Professional Work in Wet Areas
Tile installation in bathrooms and showers sometimes involves work adjacent to plumbing, waterproofing membranes, or structural substrates. In many jurisdictions, significant bathroom renovations may require permits or inspection. Always verify local building code requirements before beginning a tile project, and consider hiring a licensed tile contractor for complex wet-area installations.
Side-by-Side: A Quick Reference
| Material | Primary Role | Applied When | Goes Where |
|---|---|---|---|
| Mortar (thinset) | Adhesive bond | Before tile is set | Between tile and substrate |
| Grout | Gap filler and joint stabilizer | After mortar fully cures | Between tiles |
| Sealant | Protective barrier | After grout cures | Over grout lines; on porous tile faces |
Getting the sequence right matters as much as using the correct material. Mortar must cure before grouting - typically 24 hours at minimum. Grout must fully cure before sealing - typically 48-72 hours. Rushing any step can compromise the entire installation.
When in doubt about the scope of a tile project - particularly in wet environments with complex substrates - consulting a licensed tile installer is a sound investment before work begins.
The content on this site is for informational purposes only and is not a substitute for professional advice. Always consult a qualified professional for guidance specific to your situation.