

Why Air Sealing Matters More Than Most People Realize
Drafts are more than a comfort issue. Uncontrolled air infiltration can account for a significant share of a home's heating and cooling load, meaning your HVAC system works harder and your energy bills climb - even if your appliances are efficient. Air sealing is widely considered one of the most cost-effective home improvements available because the materials are inexpensive and the labor is accessible to most homeowners.
Before you start sealing, it helps to know which tool to reach for. Caulk is a flexible sealant applied from a tube and is ideal for gaps that don't move - think the joint between a window frame and the surrounding wall. Weatherstripping is a compressible material (foam, vinyl, felt, or metal) used on surfaces that open and close, such as door frames and operable window sashes. Using the wrong product in the wrong location leads to premature failure.
For a broader look at how air sealing fits into a full renovation plan, see our comprehensive home renovation walkthrough. And if you've heard conflicting claims about whether these upgrades are truly worth it, our guide on energy efficiency myths separates fact from fiction.
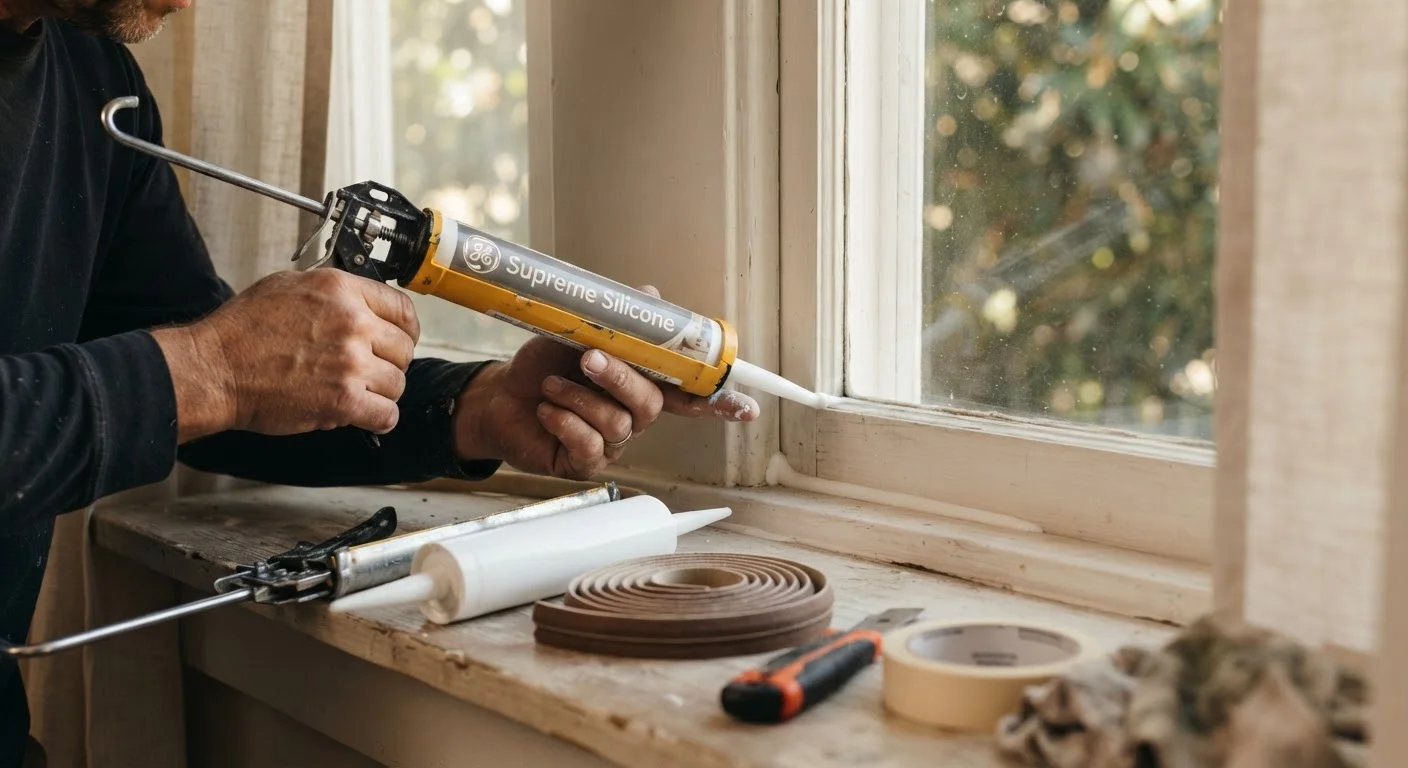
What you will need
How to Find Air Leaks Before You Seal
You can't seal what you can't find. On a cold, windy day, move a lit stick of incense or a candle slowly around suspect areas - window frames, door edges, electrical outlets on exterior walls, and baseboards. Any visible smoke or flame movement signals an air leak. A dampened hand works similarly; moving air will feel noticeably cooler.
Common leak locations by area:
- Windows: Between the frame and rough opening, around sash rails, and along sill plates.
- Doors: Along the top and sides of the door stop, under the door threshold, and at the mail slot or pet door.
- Electrical outlets and switches: Exterior-wall outlets are frequently overlooked but can be significant sources of cold air.
- Attic hatch: One of the largest single leak points in many homes.
- Basement rim joists: The framing where the floor system meets the foundation wall is a major infiltration zone.
Use Your Senses to Find Hidden Drafts
On a cold, windy day, a lit incense stick moved slowly around window edges, door frames, and outlet covers will reveal air leaks through smoke movement. Alternatively, dampen the back of your hand - moving air will feel distinctly cooler than still air. Doing this audit before purchasing materials helps you buy only what you need.
Room-by-Room Sealing Guide
Living Areas and Bedrooms
Focus on window frames first. If existing caulk is cracked, peeling, or has shrunk away from the frame, remove it completely with a putty knife or caulk remover tool before applying fresh material. Use a paintable latex caulk for interior joints. For operable double-hung windows, apply adhesive-backed foam or v-strip weatherstripping to the channels where the sash slides. Check electrical outlets on exterior walls and install foam gaskets behind the cover plates - a two-minute task that requires only a screwdriver.
Entryways and Exterior Doors
Door weatherstripping fails gradually, so damage is easy to miss. Close the door on a piece of paper; if you can pull it out without resistance, the seal isn't tight enough. Replace foam door sweeps at the bottom threshold and apply compression strips along the door stop on the top and sides. For the door frame-to-wall joint, use paintable caulk on the exterior side only - interior trim is typically not caulked to avoid trapping moisture.
Kitchen and Bathrooms
These rooms rely on exhaust fans that penetrate exterior walls - a prime leak point. Ensure vent dampers close fully when fans are off. Caulk around the base of the toilet, tub surround, and any pipe penetrations through exterior walls or cabinets. Use a mold-resistant silicone or siliconized latex caulk in wet areas; standard latex will fail quickly in humid environments.
Basement and Attic
Rim joists in unfinished basements can be sealed with caulk along the sill plate, then filled with cut-to-fit rigid foam board and sealed at the edges. Attic hatches benefit from adhesive-backed foam tape around the frame and, ideally, added insulation on top of the hatch door itself. Any pipe, wire, or duct penetration through the ceiling should be sealed with fire-rated caulk or expanding foam appropriate for the gap size.
Don't Seal Over Unknown Materials
In homes built before 1980, disturbing existing caulk or wall materials can release lead dust or asbestos fibers. If you notice chalky, layered, or fibrous materials in unexpected places - especially around pipe penetrations or older window glazing - stop work and consult a licensed inspector before proceeding. This is not a risk to take lightly.
If your home has older caulk containing lead paint, or if you're working around asbestos-containing materials, stop and consult a licensed abatement professional before disturbing anything. Our drywall repair guide also covers safe material-removal practices relevant to adjacent work.
Step-by-Step: Applying Caulk and Weatherstripping
Gather your materials and prep the work area
You'll need a caulk gun, the appropriate caulk type for each location, a putty knife or caulk remover tool, rubbing alcohol or a mild detergent, clean rags, and the weatherstripping product that matches your door or window profile. Lay down a drop cloth to catch any drips.
Remove old, failing sealant completely
Use a putty knife or a caulk-removal tool to scrape away all old caulk or weatherstripping. Incomplete removal leaves an uneven surface that prevents the new material from bonding properly. Pull off old foam tape in one piece where possible, then clean any adhesive residue.
Clean and dry the surface thoroughly
Wipe the area with rubbing alcohol or a mild detergent solution and allow it to dry completely. Dust, grease, and moisture are the most common causes of caulk adhesion failure. For exterior applications, check the forecast - most caulks require a dry surface and temperatures above 40°F (4°C) to cure correctly.
Cut the caulk tube nozzle and load the gun
Cut the nozzle at a 45-degree angle, starting small - a 3/16-inch opening suits most residential gaps. Puncture the inner foil seal with the gun's built-in poker or a long nail, then load the tube into the gun with the nozzle pointing forward. Squeeze the trigger until slight resistance is felt before moving to the joint.
Apply caulk in one continuous bead
Hold the gun at a consistent 45-degree angle to the joint and move at a steady pace, applying gentle, even pressure. Aim to fill the gap completely in one pass. For gaps wider than about 1/4 inch, use a backer rod (foam rope) to fill the gap first before caulking over it.
Tool the bead and clean up
Within a few minutes of application, smooth the bead with a damp finger or a caulk tool, pressing it firmly into the joint. Wipe away any excess with a damp rag before it skins over. Allow to cure per the manufacturer's label before painting or exposing to water.
Install or replace weatherstripping on doors and windows
Measure the door or window stop precisely and cut weatherstripping to length with scissors or a utility knife. Peel the adhesive backing gradually as you press the strip firmly in place, working from one end to the other without stretching the material. For compression strips along a door jamb, align the foam or vinyl bulb so it compresses slightly when the door is closed - enough to seal without preventing the door from latching.
Once sealing is complete, recheck suspect areas with the candle or incense test. Newly sealed spots should show no smoke movement. Allow caulk to cure fully - typically 24 hours - before painting over it or exposing it to moisture.
The content on this site is for informational purposes only and is not a substitute for professional advice. Always consult a qualified professional for guidance specific to your situation.